
Jan
How To Grow Marijuana Seeds
Cannabis Flowering Stages: First Signs to Harvest
Growing your marijuana is a rewarding experience filled with frustrations and mishaps. But those things make cultivating cannabis plants a unique experience, whether you are a recreational user or a patient.
You might sometimes want to give up and head straight to your local dispensary. And then there are moments when your determination skyrockets, especially when you achieve milestones as a cannabis grower.
One example of such is when your crops enter the flowering stage. For growers, this milestone makes their goals clearer and helps them push forward despite their hardships.
But how exactly do you approach the flowering stage to ensure a bountiful harvest while minimizing potential setbacks?
Cannabis Plant Growth Cycle
To better understand the things that you need to do to move from the cannabis plant flowering stage to harvesting buds, it is helpful to learn a few things about the growth cycle of weed plants.
How long does a marijuana plant grow and live?
It can take anywhere between 10 and 32 weeks to grow a cannabis plant, from seed to harvesting its buds.
Of course, there are a few exceptions. All in all, the whole cycle can get shorter if you are starting with clones or with an autoflower seed.
The large discrepancy in the growth cycle of marijuana plants can be attributed largely to the vegetative stage and where you grow your crops.
If you are an indoor grower, you’ll have greater control of variables related to growth. Having this high degree of control allows you to dictate when your crops enter the flowering stage.
In contrast, an outdoor grower can only control a handful of variables, including light.
4 Growth Stages of Weed Plants
The growth cycle of a cannabis plant can be broken down into four stages: germination, seedling, vegetative, and flowering.
- Germination stage
The germination stage is the shortest among the four, lasting anywhere from two to 10 days. However, there are some seeds that can take as many as two weeks to germinate.
Like many plant seeds, cannabis seeds are dry and hard. The colour of marijuana seeds can vary from light to dark brown.
If the seeds feel soft and have a green colour, there is a high likelihood that they won’t sprout.
To germinate cannabis seeds, you must moisten their hard exterior under dark conditions. At this point, the seeds don’t require nutrients.
You will know when your seeds have germinated when you see the emergence of its first leaves and a taproot.
During the germination stage, there is not much you can do but wait. Trying to hasten the process might result in damage to your seeds.
During this stage, your cannabis seeds should have around 18 hours of light if you are growing them indoors or six hours of direct sunlight if you are keeping them outdoors.
After germination, you can transfer your young cannabis plants to a small container with the substrate of your choice.
However, some growers who use autoflower seeds prefer to plant the seedlings directly in their final containers to minimize the hassle and stress of transplanting multiple times.
- Seedling stage
The seedling stage refers to the next growth phase that happens two to three weeks after germination.
At this point, the root system of your seedling grows and develops. This is a critical development stage, and as such, you should avoid overwatering your crops.
You will also notice that your plants develop new leaves. During this time, you will see that their leaves look more like the familiar cannabis leaves with multiple fingers.
The new leaves that emerge have three to seven blades.
The seedling stage is crucial because your young marijuana plants are at their most vulnerable. Seedlings can succumb to diseases or mould.
This is why it is essential to ensure that your growing room or garden is clean and has the optimal amount of light and moisture.
Like in the germination phase, your young plants do not require much water and nutrients. Your crops rely mostly on the nutrients available in the substrate. However, some growers add grow nutrients and root stimulators to facilitate faster growth and root development.
Seedlings do not require too much light. However, if you see signs of stretching, you can move your grow lights closer to your young cannabis plants.
- Vegetative stage
The vegetative stage is where a cannabis plant achieves full growth, both in terms of height and width.
Usually, this growth stage lasts between three to 16 weeks.
Ideally, your plants should be placed in their final containers. This is also the time when most growers train their marijuana plants.
At this point, you will need to increase your plants’ water intake, paying attention not only to the main stalk but also to the surrounding area. Doing so will help the roots spread out.
Plants in the vegetative stage need lots of nitrogen as well as more light.
- Flowering stage
The flowering stage is the growth phase, where your plants will produce buds and resins.
For photoperiod cannabis seeds, the flowering stage begins with a decrease in daylight hours. Autoflowering cannabis seeds, on the other hand, have the innate ability to enter the flowering stage without relying on the light cycle.
When a cannabis plant enters the flowering stage, its biochemistry changes, with that change, you will need to provide it with more phosphorus and decrease its nitrogen intake.
To coax a flowering cannabis plant will also need more intense light. It also helps to supplement your crops with carbon dioxide.
First Signs of Flowering: What to Look For
If you are still unfamiliar with the cannabis flowering stage, it’s helpful to have some knowledge about your marijuana plants’ anatomy.
This will make it easier for you to spot the signs that your cannabis plants have entered the flowering stage.
A quick look at cannabis plant anatomy
One of the first parts that you need to inspect to determine if your plants have entered the flowering stage is their stems.
Specifically, you’ll need to check the main stem, which grows directly from the roots. The other stems or branches grow directly from the main stem.
Now, these branches contain the nodes which are necessary for flower growth. Nodes are also critical for the development of leaves.
Next, you’ll need to know what cannabis flowers are. Essentially, cannabis flowers are seed pods that have yet to be fertilized.
Nodes eventually develop into buds. Buds, on the other hand, can consist either of pistils or stigmas, depending on the sex of your cannabis plants.
Pistils and stigmas look like hairs. They are hair-like, for a reason, especially in female plants: they catch the pollen released by male plants.
Pistils contain bracts that look like tiny fingers. The pistils, along with the structure known as the calyxes, form the cannabis buds. The main purpose of the bract and calyx is to encapsulate fertilized eggs.
Inspecting your plant: signs to watch out for
Now that you have a basic idea of the anatomy of a cannabis plant, here are the signs to watch out for when you want to know if your crops are in the flowering stage.
Take note that most of these signs can be tricky to discover, especially if you don’t know exactly what you should be looking for in each cannabis plant.
Also, most of these signs usually appear after you switch to a 12/12 light cycle.
1. Stretching stems
One of the telltale signs that your crops have entered the cannabis flowering stage is that their stems have grown longer.
Seasoned growers call this phenomenon the post-vegetative or pre-flowering stretch.
Typically, this growth spurt lasts anywhere between two to three weeks.
During the pre-flowering stage, you will notice remarkable growth in your cannabis plants. It’s not unusual for marijuana plants to double or even triple their height during the early parts of the flowering stage.
After your plants are done stretching, they’ll focus their resources on producing buds.
2. Hair-like growth in the nodes
Eight to 12 days after switching to a 12/12 light cycle, you will notice hair-like growths on the nodes. These hair-like structures are the foundation of the calyxes.
Growers who plant regular seeds use this time to determine the sex of their marijuana plants.
Remember, if you are growing cannabis plants for their flowers, you’ll need to keep female plants and discard the males. Otherwise, you risk accidental pollination of your females.
You can distinguish female cannabis plants from male plants by looking at the pollen sacs which develop from the calyx. The pollen sacs have an uncanny resemblance to animal testicles, hence the nickname given by growers to them – nut sacks.
The hair-like structures typically appear in the second week. By the third week, you will immediately notice the pistils, even when you’re standing from a distance.
Around the fourth week, the sexual organs of the female plants begin to swell, forming the buds.
3. Bract enlargement
One final sign that your female cannabis plant has entered the weed flowering stage is that its bracts are enlarged.
Around week four, you will notice that the stretching of the stems has slowed down or stopped entirely.
You will also see that the bud sites begin to fill in, and the buds look more noticeable.
Around week five, the space between nodes should be filled, and the colas begin to form.
The stems, on the other hand, are noticeably stiffer compared to when your plants were in the vegetative growth stage.
The Pre-flowering Stage
The light cycle is critical for inducing your marijuana plants to enter the flowering stage.
This is particularly true if you are growing photoperiod cannabis seeds. With these cannabis seeds, you will need to transition them to a 12/12 light cycle.
With autoflower cannabis seeds, the plants will enter the flowering stage on their own without relying on the light cycle.
Instead, they will mature into flowering plants depending on a few factors, like reaching a specific height or age or, in some cases, having a certain number of nodes.
These are but a few reasons why autoflowering plants are less complicated, making them perfect for beginners.
With photoperiod plants, you will have a slight degree of control in terms of when you want to initiate the flowering stage.
But what should you expect when your plants leave the vegetative stage, and the flowering stage begins?
Week 1 of the Pre-flowering Stage
On average, the pre-flowering phase takes two weeks for photoperiod weed plants and one week for autoflowering cannabis seeds.
Cannabis genetics also influences the flowering cycle of the weed plant. For example, Sativa-dominant strains stay in the pre-flowering stage compared to Indica-dominant strains.
During this stage, you will notice white hairs on the nodes. This is one of the signs of the flowering stage. Or, to be more precise, this means that your weed plant is making the transition from vegetative growth to the flowering phase.
If you bought and planted regular cannabis seeds, this is the perfect time to sex your plants because, at this point, your plants will begin to exhibit their sexual characteristics.
Unless you are cultivating cannabis plants for breeding, you should cull your male plants. Otherwise, your flowering plants might be pollinated.
During the first few weeks of the flowering stage, you will also notice that your weed plants take on a bright light green colour, especially in their bud sites.
This indicates that your marijuana plants are ready to grow more white hairs.
Week 2 of the Pre-flowering Stage
During this stage, you will begin to notice your cannabis plants grow taller due to the flowering stretch. Weed plants need to grow as tall as they possibly can to ensure their survival.
The actual growth of your plants will depend heavily on their genetics. Some grow at a remarkable pace, while other strains don’t grow a lot.
Transitioning from Veg to Flower and Inducing Flowering
If you are growing regular photoperiod cannabis seeds, you need to help your crops transition from the vegetative stage to the flowering stage.
How do you know when your marijuana is ready for the flowering stage?
Many seasoned growers suggest that cannabis plants should enter the flowering stage after nine to 15 weeks after germination.
However, this is just a general rule. Aside from your crops’ age, there are a few factors that you might want to consider when you want your crops to turn into flowering cannabis plants.
- Current height
One of the first things you should know is that flowering cannabis plants tend to double their height.
Ideally, you should flip your plants when they reach a height of one foot. If you let your crops grow beyond that, it is highly likely that they’ll grow four to five feet come harvest time.
The drawback of that situation is that your plants might grow too close to your grow lights or the ceiling of your grow room.
- Root development
As much as possible, repot your weed plants while they are still in the vegetative growth stage.
This is important for two reasons. First, this gives you an opportunity to check their roots. Ideally, your crops should have excellent root development before the flowering stage begins.
Second, transferring your plants during the vegetative growth stage gives the roots the opportunity to recover from stress. Transplanting marijuana plants from one container to another can cause stress.
When your cannabis plant is stressed when leaving the vegetative growth stage, it will spend its resources on recovery instead of bud development.
- Plant strength
A flowering weed plant should be strong enough to bear the weight of flowers.
Additionally, you should wait until there are more nodes and leaves on your plants. That is why most growers prefer to patiently wait for their plants to develop before coaxing them to enter the flowering stage.
- Overall health
Before the cannabis flowering stage begins, your plants should be in the pink of health.
If your plant has been dealing with nutritional deficiencies and imbalances in humidity, temperature, and light, you should keep it in the vegetative growth stage to recover.
Once it enters the cannabis flowering stage, it might not be as productive compared to a healthy weed plant.
Starting the flowering cycle
Once you are certain that your plants are ready to enter the flowering stage, the first thing to change is the light cycle.
Plants that are still in the vegetative growth phase use darkness to repair themselves, taking advantage of all the energy they accumulate during the day.
During the flowering phase, your plants will use the hours of darkness to develop buds.
When you want to transition your plants from the veg state to the flowering stage, they will need to change the light cycle to a 12/12 scheme.
But aside from modifying the hours of light and darkness, you should also give your plants higher-intensity light.
Temperature, humidity and feeding also need to change once your plants flower; those are covered under Keeping Flowering Plants Healthy below.
Light schedules for inducing flowering
Cannabis is categorized as a short-day plant. That simply means that it enters the flowering stage once the season transitions from summer to fall. This coincides with the shorter daylight available during this time.
In the northern hemisphere, most plants enter the flowering stage a month before the autumnal equinox. In the case of marijuana plants, their flowers are ready to harvest around the final week of October. However, there are some flowering cannabis strains that may take a bit longer than that.
When it comes to the flowering stage outdoors, plants can be induced to produce buds with minimal intervention. This is especially true for Indica-strains.
If you are an indoor grower, the standard practice you can follow is to shift your plants from an 18 to 24 daylight scheme during the vegetative stage toward a 12/12 light schedule.
Some growers prefer to mimic the natural transition from summer to autumn by slowly decreasing daylight over the course of a two to three-week period.
There are also some growers that choose to give their vegging plants one to two days of total darkness before shifting to a 12/12 light cycle. These growers believe that total darkness can hasten the transition from the vegetative stage to the flowering phase.
Additionally, these growers believe that total darkness can facilitate the increase of the flowering hormone known as florigen in flowering plants.
Light cycle for Sativas and ruderalis
If you are cultivating a ruderalis strain indoors, you can provide your plants with 18 to 24 hours of daylight while still in the vegetative growth stage.
Sativa-dominant strains, on the other hand, thrive under an 18/6 and 12/12 light cycle. Other growers prefer a 14/10 light cycle, citing that those additional hours of darkness helps in increasing overall yield while reducing flowering time.
If you do choose this route, it is a good idea to start the flowering stage with a 12/12 light cycle and then transition to a 14/10 light cycle after a month.
Telling Female and Male Plants Apart
Unless you are interested in breeding and producing cannabis seeds, it is a good idea to identify the sex of your plants before they reach the flowering stage.
Cannabis is a dioecious plant which simply means that there are male and female marijuana plants.
Now, when you buy regular cannabis seeds, there’s a strong chance that half of them are male and the rest are female.
If your goal is to harvest flowers, you will need to discard the male plants (as well as the hermaphrodites) to prevent them from pollinating your female plants.
When female plants are pollinated, they will focus their energies on seed production instead of flower production.
Essentially, you want to know the gender of your plants so that you can use your resources more efficiently and prevent pollination.
How to identify male plants
To spot the male plants from your crops, the first area that you need to look at are the main stem nodes, especially the topmost portions where the sex characteristics show up first.
Like female plants, the males have sacs. However, in males, these sacs form into clusters that are shaped like bananas. Within these sacs is pollen.
These sacs can open up in a matter of days after they appear. And once these sacs open up, the pollen can disperse and fertilize your females.
This is why it is critical to identify the male plants as soon as possible.
How to identify female plants
Female plants have one to two white hairs called pistils that stick out from the top.
Sometimes, the pistils do not appear immediately during the pre-flowering stage. You might have to wait for a couple of days before they appear.
Females also produce stipules that also look like green hair. Although male plants can sometimes produce stipules, in females, these stipules can cross one another. The stipules in male plants rarely cross one another.
How to identify hermaphrodites
Hermaphrodites are cannabis plants that exhibit both male and female characteristics.
A cannabis plant can turn into a hermaphrodite after being subjected to stressful conditions like poor nutrition, temperature extremes, and excessive pruning.
There are also hermies that are genetically predisposed to be so.
Either way, you have to cull hermies because they have sufficient pollen to fertilize female flowers.
For the full identification guide, including what a seed can and cannot tell you and when feminized seeds make sense, see Male vs Female Cannabis Plants.
Marijuana Flowering Stage Week by Week
The cannabis flowering stage can be divided into two halves: the first flowering weeks and the late flowering stage.
To give you a fair idea of what to expect from your flowering cannabis, here is a week-by-week breakdown of the flowering period.
Flowering stage: weeks one to three
During the first few weeks of the flowering stage, you won’t notice too many differences in your cannabis plants.
During these three weeks, your plants will continue to grow. And as such, you need to ensure that you meet their nutritional needs and provide them with ample space to grow.
Week 1
The first week of the cannabis flowering stage is all about transition.
At this point, you will notice furious growth among your plants. It is not unusual for some strains to double their height during this period. Weed plants entering the flowering stage will grow more leaves and colas.
This growth spurt is necessary to support the development of buds.
To support your plants during this phase, you will need to provide them with the necessary nutrients. However, do not change their nutrition drastically.
According to experienced growers, it is best to wait until the actual flowering phase begins before changing fertilizers.
Week one is also the best time to start training your plants to maximize your yields.
Week 2
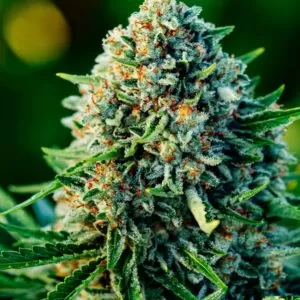
During the second week of the flowering stage, you will notice white pistils appearing on your females. These white hairlike structures will eventually transform into buds.
Some growers identify the sex of their plants during the second week because the differentiating characteristics usually appear at this point.
As much as possible, eliminate your males to prevent them from pollinating your female cannabis plants.
During this stage, it is essential to feed your plants appropriately. Be sure to check the product labels and suggested feeding schedule to increase bud production and prevent nutrient burn.
Week three
During the third week of the flowering phase, your plants should be noticeably bigger. However, your plants will slow down their growth and begin ramping up their flower production.
If you carefully inspect your plants, you will see flowers developing in the areas where the white hairs were previously seen.
Although your plants are deep into the bud production stage, you still won’t see the trichomes and resin glands. As such, your plants won’t emit a pungent scent.
Like in week two, you should make sure that your plants get the nutrients they need. This week is an opportune time to troubleshoot problems like underfeeding and nutrient burn.
Week 4
By the fourth week, your plants have stopped growing and turned their attention toward growing buds.
Although you might see a few white hairs here and there, it is more likely that you’ll see the buds have grown larger.
Week 5
During the fifth week, the buds should be noticeably larger. At this point, you may also have new buds growing from the main cola.
During this point of the flowering stage, you will notice that your plants are emitting a strong, pungent scent.
The fifth week is also the time when you will see changes in the colour of the pistils and trichomes. During this time, the pistils will grow darker while the trichomes become whiter.
Late flowering stage
The late flowering stage covers the last few weeks before harvest. On average, most strains are ready to harvest by the eighth week. However, there are some strains that may take longer than that to be ready for harvest.
During this period, your plants should have stopped growing. Instead, they will focus all of their energies on bud growth and development.
It is also normal to see some of the leaves, especially the ones located at the bottom, turn yellow.
However, if you notice yellowing leaves before the late flowering stage, you might be dealing either with light burn or nutrient issues. Deal with these as soon as you can to prevent problems later on.
Another issue that might arise during the late flowering stage is foxtailing. Foxtailing occurs when your grow room is too hot, or the light level is too much for your crops. Again, make the necessary adjustments as soon as you can.
The late flowering stage is all about maintenance. Do not change your feeding scheme. It won’t prevent yellowing leaves or increase bud production.
Keeping Flowering Plants Healthy
The start of the flowering phase is a critical time for your crops. And as such, there are a few variables that you have to get right to ensure that your plants remain healthy until harvest time.
Listed here are a few essentials that will help you achieve that goal.
1. Light
Light is essential for all the stages of the growth of your marijuana plants. However, never has lighting been more important than in the flowering stage.
Certainly, you need to maintain the appropriate light cycle scheme depending on the strain of marijuana that you’re cultivating.
But aside from that, it is essential that your plants get the appropriate hours of darkness.
Light contamination can adversely affect your harvest. For one, it can cause your buds to taste harsh.
Light contamination can also cause marijuana plants to revert to the vegetative stage or cause hermaphroditism.
As much as possible, maintain total darkness in your grow room. If you are an indoor grower, refuse the urge to take a look at your plants during their designated dark hours.
It is also a good idea to check for light leaks before the first few weeks of the flowering phase.
2. Temperature and humidity
As much as possible, keep the temperature in your grow room within an 18° to 26°C range.
If the temperature range goes below this recommendation, your plants can slow down their growth. Worse, when your plants are exposed to freezing temperatures for an extended period, they can get damaged.
High temperatures are just as bad for flowering cannabis. If it gets too hot in your grow room, you will need to face a host of problems, including slower growth, dried leaves, and high evaporation rates.
For the relative humidity in your grow room, it is best to keep it between 40% to 50%. Anything higher than that can make your flowering plants vulnerable to mould and fungi.
3. Flowering Stage Nutrition
Marijuana plants need nitrogen, phosphorus, and potassium to thrive.
But once they enter the first few weeks of the flowering stage, you have to modify the ratio of these three nutrients. Before your plants start following, you need to increase their intake of phosphorus and potassium and decrease their intake of nitrogen.
Aside from these three nutrients, your plants will also need others, including sulphur, magnesium, calcium, zinc, boron, cobalt, copper, manganese, iron, molybdenum, and silicon.
However, be judicious in your use of nutrients. As the old adage goes, too much of a good thing can be bad. You might think that once your plants enter the flowering phase, they’ll need more nutrients.
But giving too many nutrients when your plants don’t need them can cause a nutrient burn. Nutrient burn happens when marijuana plants get too many nutrients.
Nutrient burns can lead to a nasty taste in the buds as well as cause irreparable damage.
Dried leaf tips indicate that nutrient burn is setting in. If you notice this, stop giving your plants nutrients. Afterward, check which nutrients your crops lack. From there, slowly introduce the nutrients they need.
4. Water
Like nutrients, water is another essential for cannabis growth and health. But it is also fairly easy to overwater your plants.
As much as possible, avoid overwatering your plants. A good rule to follow is to water your crops only when the top portion of their substrate is dry, about an inch or so.
Also, stick with substrates and containers that facilitate drainage.
5. pH level
Marijuana plants thrive at a pH level between six and 7. This pH level facilitates the optimum absorption of nutrients.
Anything lower or higher can lead to nutrient deficiencies.
6. Ventilation
Ventilation is also crucial for plants in the flowering stages, especially if you are an indoor grower.
Lack of proper airflow and ventilation can adversely affect humidity levels in your grow room. Worse, you might inadvertently invite bud rot, fungi, and mould.
As much as possible, invest in a quality ventilation system that will funnel stale air out and let fresh air in.
For smaller grow rooms, an exhaust fan can do a perfect job of facilitating air circulation. But if you have a larger grow room, you may want to invest in a dehumidifier.
Training During Flowering
Training your plants when you see the signs of the flowering stage is a good way to maximize your grow space and ensure maximum yield.
But what exactly does it mean to train your marijuana plants?
Training is done by cannabis cultivators for a variety of reasons. First, it helps plants develop stronger stems, especially if they are planted outdoors.
Training also helps increase yield by making marijuana plants stronger. Strong plants focus their energies on producing buds instead of reinforcing their stems.
There are different types of training methods, including vertical plant staking and horizontal plant training methods. But for flowering cannabis, the best method to use is Low Stress Training or LST.
What is LST?
LST is a cannabis training method that involves applying a low level of stress. This type of training helps your crops to become bushier and encourages them to grow wider.
When your marijuana plants are bushy, they tend to develop more bud sites. Additionally, the use of low stress techniques encourages the growth of high-potency buds.
LST entails pulling the branches away from the main stems. What it does is allow light to get to the lowest branches.
If you are an indoor grower, LST can also help you get the most out of your grow space by keeping your plants short.
With the use of the appropriate grow light, it is not unusual to double or triple the amount of bud sites in your marijuana plants.
LST concepts
To better understand why LST is an effective way to increase yields, it is critical to have some idea of how vegging plants grow.
Typically, marijuana plants grow from one main stem that produces smaller branches.
Now with LST, you bend the main branch at a certain distance away from the center. This allows more branches to grow and expose the leaves to more light.
In turn, this allows the plant to reach its full growth potential.
Many growers who practice LST talk about the sweet spot. What does that mean?
When it comes to LST, the sweet spot means achieving the right spacing to maximize the use of grow lights.
Usually, the farther the leaves are from a grow light, the less light they get. But aside from that, those leaves need to use more energy for photosynthesis.
When you reach the sweet spot through LST, the leaves get more light, and your crops can spend their energy on bud production.
Topping and LST
Topping is often used in conjunction with LST.
With topping, your goal is to entice your plants to develop more branches and, by extension, more bud sites.
Although topping is often practiced along with LST, that is not necessarily the case in most situations.
Specifically, you should avoid topping your autoflowering strains. Autoflower cannabis plants have a shorter growth cycle. Topping them will not give them sufficient time to recover.
Best strains for LST
Generally, most cannabis strains can thrive when undergoing LST. However, many growers say that Indica-dominant strains thrive best when trained this way.
Preparing for Harvest and Knowing When to Harvest
The late flowering stage is also the best time to prep your plants for harvest. Harvesting buds isn’t just about cutting the flowers off your plants. You need to make the necessary preparations to get the most out of your flowering cannabis.
Flushing your plants before harvesting
One of the essential tasks that you need to do before harvesting buds is flushing.
Flushing helps ensure that the flowers have a better aroma and flavour. But what exactly is flushing?
Flushing refers to the act of running water through the substrate. Running water through the substates removes excess nutrients and forces the plants to use up all the nutrients they’ve stored up.
Flushing is best done around two weeks before harvest.
Wean your plants off fertilizers two weeks before harvest.
Check your plants
Before harvesting flowers, your plants should be in good health.
A few weeks before harvest, check your flowering cannabis for signs of pest infestations, fungi, mould, and mildew.
This is also a good time to remove big and damaged leaves.
Knowing when to harvest buds
When it comes to harvesting cannabis flowers, timing is essential. You don’t want to harvest buds before they are ready or already overripe.
But how exactly do you know when to harvest the buds?
In general, the buds ripen around eight to 12 weeks into the flowering stage. Of course, there are some strains that are ready for harvest a little earlier than that.
But generally, you need to look at your flowering cannabis around that period.
Growers look at two things to ascertain whether the buds are ready for harvest.
Look at the pistils
First, check the colour of the pistils. If the pistils are still white in colour, you will need to wait a little longer. Your plants are not yet ready for harvest.
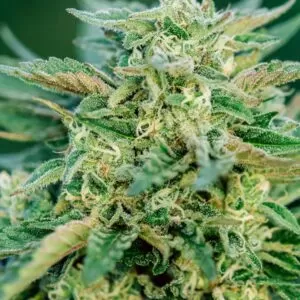
However, if the pistils have turned orange or brown in colour and you notice that these structures have curled inwards, that means that your crops are ready for harvest.
Look at the trichomes
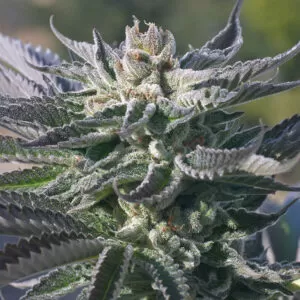
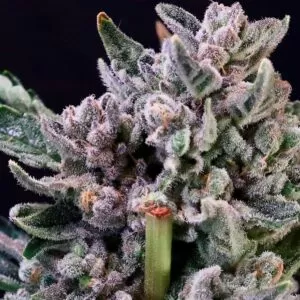
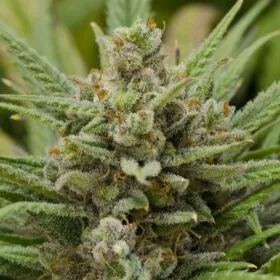
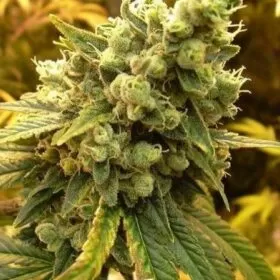
The trichomes are the resin glands of cannabis. When the buds are ripe, they turn white, giving the plants a frosted look.
Some growers prefer to use the colour of the trichomes as an indicator of harvest readiness. Pistils may change their colour to orange or dark brown even if the plants are not yet ready for harvest. This happens because of changes in their growing environment.
Flowering Stage Best Practices and Tips
Once you see the first signs of flowering, it is easy to fall into a state of complacency. But your job’s not yet finished. You still have a long road ahead before you can truly enjoy the fruits of your labour.
Here are a few tips that will help you and your plants head through the finish line while minimizing potential hassles along the way.
Use your best plants
It’s easy to understand why some growers, especially the new ones, want to bring all of their plants to the flowering phase.
However, that isn’t exactly a good idea. For one, you can end up wasting your resources. Second, some plants may not be entirely suitable for bearing buds.
One way to ensure that only the best plants move to the next growth cycle is to plant as many cannabis seeds as you possibly can.
Although that may mean investing more resources early on, the advantage of this is that you will have more plants to choose from.
Prep your plants
Make sure that your plants are healthy a few weeks before they leave the vegetative stage and enter the flowering stage.
The last few weeks of the vegetative stage are the best time to troubleshoot issues like nutrient deficiencies, pest infestations, and yellowing leaves.
If your plants have been dealing with fungi, the first two weeks of the flowering stage are the best time to apply fungicides like neem oil.
Neem oil can be used to help your plants deal with pests like budworms, powdery mildew, and mould.
Upon seeing the first signs of flowering, you should stop practices like transplanting and training. These are stressful to plants and can lead to the growth of hermaphrodites among your crops.
Make the transition gradual
Transitioning into the flowering stage means that your plants’ growth requirements change.
But instead of changing your crops’ nutrients and your grow space’s temperature and humidity levels in one go, it is a better idea to make these changes gradually.
The last thing that you’d want to happen is to stress your plants with these changes.
During the flowering stage, outdoor growers only need to make one vital change – nutrition. That’s the only thing that you can control.
During your plants’ last days at the vegetative growth stage, begin implementing a few changes to their nutritional regimen to allow them to make a seamless transition and prevent shock.
Indoor growers, on the other hand, can make minor adjustments to the lighting, temperature, and humidity levels in their grow spaces.
Most growers adjust the temperature in their grow spaces before modifying humidity levels. After these, you can then modify the light cycle of your plants.
Trim leaves and branches carefully
Before entering the flowering stage, it is a good idea to remove the lower leaves and branches. The main idea behind this is that these parts won’t get enough light and will only compete with other branches and leaves for precious resources.
The best time to do this is one or two weeks during the flowering stage.
Some growers defoliate the leaves of their plants. The idea behind this practice is that they want their plants to produce their buds.
However, practice caution when trimming leaves and branches off your plants. Remember, the leaves are necessary for photosynthesis. The energy that the leaves harness is vital for bud production.
If you must trim your plants, set your sights on dead leaves and branches.
By the final stretch of the flowering stage, you will see that the leaves turn brown. This indicates that your flowering cannabis plants have focused their energy on bud production.
Prevent root damage
Before your plants transition to the flowering stage, it is a good idea to brace them.
Using netting or stakes helps strengthen the plants and allows their roots to become more stable.
Remember, once your plants produce buds, they will need to support a heavier weight.
Facilitate airflow in your grow space
Aside from investing in ventilation, there are a few things that you can do to improve airflow in your grow space.
One such thing is ensuring that there is adequate space between all your plants.
With enough space, you can prevent light hotspots and ensure the optimal exchange between oxygen and carbon dioxide among your plants. Good airflow can also prevent problems like mildew.
To achieve these goals, you might want more circulating fans inside your grow space. It’s also a good practice to monitor the relative humidity in your grow space periodically.
To keep the pungent aroma at a low level and facilitate proper airflow, consider investing in an airflow system, preferably one with a carbon filter.
Prevent light burn
Like overfeeding, excessive light intensity can cause more harm than good.
If you are growing cannabis indoors, it is a good practice to set your grow lights around one to three feet away from the top of your plants.
The actual distance between the top canopy of your plants and your grow lights will depend on the wattage of your lamps.
Once you make a shift in your light cycle scheme, make sure that you stick with that. Do not change anything or revert to the previous light cycle. Otherwise, this can cause problems like the appearance of hermies among your crops.
The hours of darkness and the hours of light should remain consistent throughout the flowering stage. If you have the resources, consider investing in a programmable timer.
Use the right light spectrum
Aside from transitioning your plants to a different light cycle during the flowering stage, you should also make sure that you are using the optimal light spectrum.
During the flowering stage, your plants will need more red spectrum lights and less blue spectrum lights.
Of course, this is just a general guideline. Your plants’ specific strains may have different requirements in terms of the light spectrum. It is up to you to experiment with which spectrum works best for your plants.
The easiest way to do that is to find grow lights that can be easily adjusted depending on your plants’ requirements.
Optimize your grow space
Relative humidity, temperature, and CO2 levels are but a few of the variables that you need to get right once your plants are in the flowering stages.
Your flowering cannabis needs a relative humidity level below 45%. Go higher than that, and you risk dealing with bud rot. When bud rot sets in, you will certainly face an uphill battle.
During the daytime, it is best to keep the temperature at 75°F. You can lower the temperature to 65°F during nighttime.
As for CO2 levels, it is a good practice to keep it between 1,000 and 1,200 ppm. This range will facilitate optimal bud production.
However, these recommendations can change depending on the strain you are growing.
Nail down proper nutrition
Plant nutrition during the flowering stage can be tricky. You need to find the sweet spot between over and underfeeding, which can harm your crops.
The first thing that you need to understand is that your plants’ nutrient requirements change depending on their growth phase.
Specifically, you will need to change the ratio of nitrogen, phosphorus, and potassium depending on the growth phase.
During the veg phase, the ratio is usually 6-3-2, 4-2-1, or 2-1-1. Once in the flowering stage, you will need to taper down nitrogen while increasing the other nutrients.
Consider using molasses
Friendly bacteria live in the soil you use as a substrate for your crops. These microorganisms can help your plants grow bigger and denser buds by facilitating the optimal intake of nutrients from the soil.
Soil bacteria can also help make marijuana flowers stickier and taste sweeter. There are also some growers who report a massive increase in their yields.
But how do you ensure that the friendly bacteria help you?
The simplest thing that you can do is to use molasses. The microorganisms feed on molasses and, in turn, reward you with the aforementioned benefits.
To use molasses, you can apply a small amount, like a fertilizer, when you are watering your plants.
But a word of caution: do not use other carbohydrates or sugar sources. They may feed friendly bacteria, but they can also attract pests.
Also, molasses only works if you are using soil as a substrate. Do not use molasses if you have a hydroponic setup. Molasses can clog up your system and damage your filters.
Genetics matters
Even if you pour all your resources towards your crops to ensure their growth and flower production, you just can’t expect to get a high yield if their genetics are poor.
Even seasoned growers can do little to change what genetics dictates.
This is why it is important to start right and grow seeds that have excellent genetics.
Troubleshoot problems before they worsen
Make it a habit to regularly monitor and inspect your crops. This will give you enough time to rectify mistakes before they spiral out of your control.
Take yellowing leaves, for example. It is normal to see a few yellowing leaves here and there. But when you see many plants with yellow leaves, it might indicate that your crops are suffering from nutrition problems or light burns.
Foxtailing is another sign of light burn. This occurs when a new bud comes out from the side of another bud.
This problem means that there is something wrong with the heat or light in your grow room. Left unchecked, this can lead to discoloured buds and lower THC levels.
Be flexible and adjust
Early on, be clear about your goals. Perhaps you are planting cannabis for THC extraction. Or maybe you want to focus on bag appeal or potency.
Your goals will dictate the type and amount of work you have to put in.
And if you watch your crops closely, you need to be flexible to adjust your practices to ensure that you achieve your goals.
Once your plants enter the flowering stage, the finish line becomes more visible. If you follow this cannabis flowering stage guide, you’ll be able to reap the benefits of your hard work while avoiding some of the common pitfalls new growers experience.
Want more practical tips and advice about growing marijuana? Explore our blog page for more helpful resources.
In stock now
Six Atlas Seed strains, in stock and shipping now. Every pack is covered by our 90% germination guarantee.