Sep
How To Grow Marijuana Seeds
Growers: Move Seedlings When Roots Show and After 2 to 3 True Leaves
Transplant seedlings when roots are visibly filling the starter container and the plant has two to three true leaves, not just cotyledons. Pre-moisten the new medium 12 to 24 hours ahead so it’s damp, not soggy, and have your pot ready before you ever touch the root ball. For autoflowers, skip the middle steps and go straight into something close to the final pot, since every transplant costs them time they don’t have.
TL;DR:
- Cannabis seedlings should be transplanted when roots visibly press against the container walls or drainage holes, typically 10 to 14 days after germination in small pots.
- Transplanting autoflowers directly into near-final pot sizes (3 to 5 gallons) is crucial to avoid stress that can waste their limited lifecycle, unlike photoperiod plants which can tolerate staged pot increases.
- Pre-moisten the new medium 12 to 24 hours before transplanting to prevent air pockets around roots and promote steady moisture contact during移transplantation.
- Handle seedlings by the leaves and avoid stressing roots with rushed moves, cold soil, or immediate nutrient feedings to maximize survival chances.
- For outdoor hardening, gradually expose seedlings to full sun over 7 to 14 days and keep temperatures above 50°F at night to prevent growth setbacks.
Table of Contents
- How do you know cannabis seedlings are ready to transplant?
- Choosing pot progression and prepping your growing medium
- Step-by-step technique to transplant cannabis seedlings
- How do you harden off seedlings before an outdoor transplant?
- What should you check after transplanting cannabis seedlings?
- Should you transplant autoflowers the same way as photoperiod plants?
- Why does this seed bank’s approach to seedling guidance hold up?
- A grower’s honest take on transplant day mistakes
- Seed choices that make transplant success easier from day one
- Sources
- FAQ
How do you know cannabis seedlings are ready to transplant?
Two signals matter more than any calendar date: roots and leaves. Look at the drainage holes on the bottom of a solo cup or plug tray. If you see white roots pressing against the plastic or poking through the holes, the seedling has largely filled its container’s soil volume and is asking for more room. Extension guidance from Utah State University recommends potting up once roots are clearly visible, but before they mat into a dense tangle that’s harder to loosen without tearing.
Many experienced growers use an informal “80% root fill” rule: once roots occupy roughly four-fifths of the visible container, wait no longer. Push past that point and the plant sits root-bound, cycling nutrients through an increasingly cramped space instead of putting energy into new growth above the soil line.
Leaf stage backs up what the roots are telling you. Wait for two to three sets of true leaves, the serrated cannabis-shaped leaves that follow the rounder cotyledons. In trays or multi-cell flats, watch for leaf overlap between neighbouring cells. That overlap is a visual cue that canopy space is running out at the same time root space is.
Timing in the container gives you a rough backup check when roots aren’t easy to inspect:
- Solo cups or small pots: typically ready in 10 to 14 days from germination.
- Plugs or plant flats: usually 2 to 3 weeks, depending on cell size, since smaller cells fill up faster.
- Float-system or hydroponic starts: often develop larger root systems faster than soil-started seedlings, which can shift your timeline earlier.
Two conditions should stop you even when the plant looks ready. Don’t transplant into a grow space with night temperatures below 50°F. Cold soil slows root uptake right when the plant needs to reconnect quickly, and that combination of stress plus chill is what causes stunted, sulking seedlings. Also skip it if the root ball is waterlogged. A saturated medium is heavy, falls apart when handled, and tears roots that would otherwise slide out clean. Let it dry slightly toward “damp, not dripping” before you move it.
Choosing pot progression and prepping your growing medium
Pot size progression depends entirely on whether you’re growing photoperiod or autoflowering genetics, and the biggest mistake growers make is treating both the same way.
For photoperiod plants, a gradual step-up works well: a solo cup or small plug, into a 1 gallon pot, then a 3 to 5 gallon container for vegetative growth, and finally into whatever final size fits your space (5 to 10 gallon or larger for bigger canopies). A useful grower rule of thumb: keep each jump to roughly 2 to 3 times the previous pot’s volume. Going bigger than that risks “drowning” young roots in a wet volume of soil they can’t access fast enough, which invites root rot before the plant grows into the space.
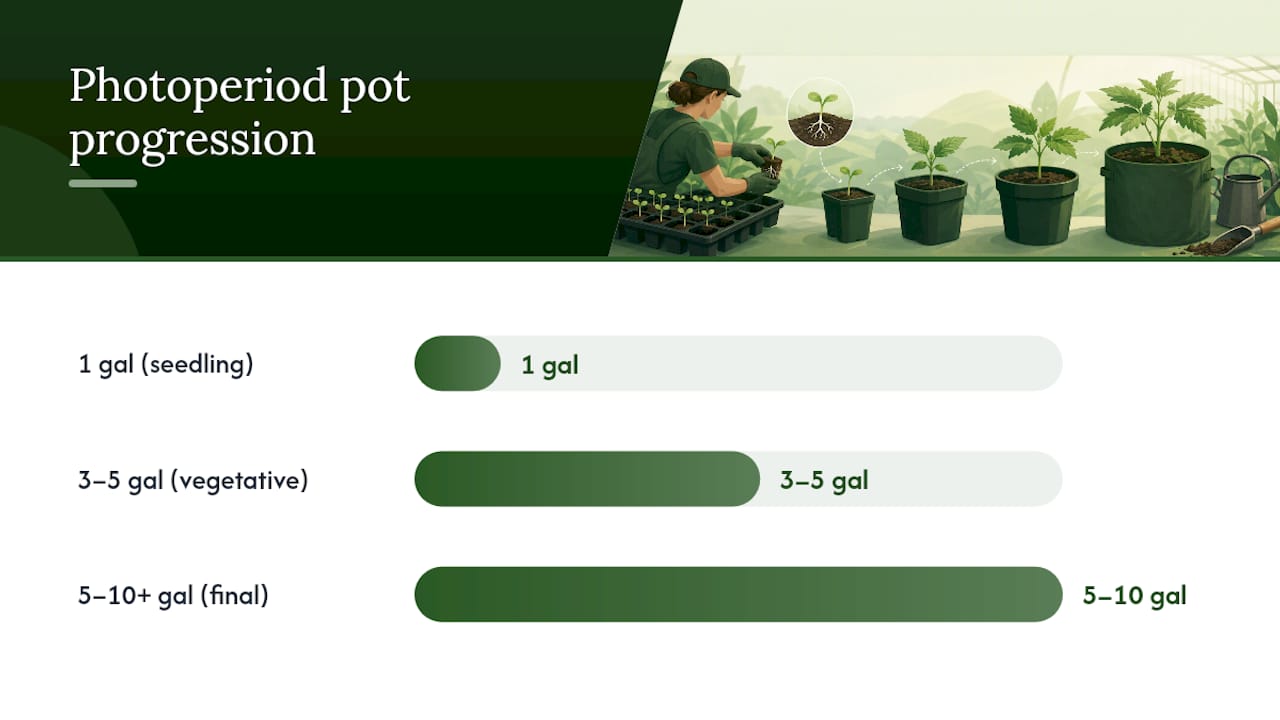
Autoflowers don’t have that luxury of time. Their entire lifecycle runs on a fixed internal clock, so plan to skip the middle stages and move seedlings close to their final pot size early, usually 1 to 3 gallons at minimum for a seedling headed to a 3 to 5 gallon final container.
Media choice affects both moisture behaviour and pH targets:
- Soil mixes: aim for a pH range of 6.0 to 7.0.
- Coco coir: target 5.5 to 6.5, and expect faster drying between waterings than soil.
- Soilless plugs (rockwool, peat-based): easy to transplant intact but need consistent moisture to avoid drying at the edges.
Whatever medium you choose, pre-moisten it 12 to 24 hours before transplant day. This is not optional. A dry medium creates air pockets around new roots and wicks moisture away from the transplanted root ball right when it needs steady contact with damp soil. You want the new medium damp enough to hold its shape when squeezed, but not dripping.
One additive worth considering: mycorrhizal inoculants. A peer-reviewed trial on cannabis seedlings found that Rhizophagus irregularis increased root length by a notable amount and improved survival rate and overall seedling quality index compared to untreated controls. It’s not a guarantee of anything, but the evidence for root development is real enough that mixing a small amount into your new medium at transplant is a low-cost experiment worth running.
Pro Tip: Mix mycorrhizal inoculant directly into the planting hole rather than sprinkling it on top. Roots need to grow into contact with the fungus, and surface application often just sits there doing nothing.
If you started in straight seed-starting cubes rather than soil, this is also the point where habits from earlier germination choices catch up with you. Seeds germinated directly in dense garden soil tend to develop messier, harder-to-extract root systems than those started in a controlled medium built for easy transplanting later.
Step-by-step technique to transplant cannabis seedlings
Get everything staged before you touch the plant. Rushed transplants are where roots get torn and stems get snapped.
What you need on the bench:
- The new pot, filled with pre-moistened medium and a hole already dug to roughly the size of the old container.
- pH-adjusted water at room temperature (cold water shocks roots).
- Clean hands or gloves, and a small tool like a pencil or chopstick for loosening stubborn root balls.
- A tray underneath to catch spilled soil or water.
The transplant procedure:
- Squeeze and release. Gently squeeze the sides of a solo cup or flexible pot to loosen the root ball from the container walls before you try to pull anything out.
- Handle by the leaves, never the stem. Extension guidance is consistent on this point: a damaged leaf grows back, a crushed stem often doesn’t. Hold a true leaf between two fingers while your other hand supports the base of the root ball.
- Tilt and let gravity do the work. Turn the container on its side and let the root ball slide out on its own rather than yanking it upward. If it resists, squeeze the sides again rather than pulling harder.
- Size the hole to match. Use the old pot as a rough template for the new hole’s depth and width, so the root ball isn’t forced into a space too tight or left floating in one too loose.
- Set the depth correctly. Place the top of the root ball level with, or about 1 to 2 centimetres below, the surface of the new medium. This slight recess helps water pool and soak in rather than running off the sides.
- Backfill without compacting. Add soil around the root ball and firm it gently with your fingertips. Press too hard and you squeeze out the air pockets roots need to breathe; press too little and the root ball won’t have solid contact with the new medium.
- Water the perimeter, not the centre. Pour pH-adjusted water in a slow ring around the edge of the new hole rather than directly on top of the transplanted root ball. This encourages roots to stretch outward into the fresh medium instead of staying clustered where they already were.
- Hold off on nutrients. Wait 48 to 72 hours before introducing any feed. A freshly transplanted root system is bruised and stressed, and additional nutrient salts at this stage tend to do more harm than good.
Once the plant is in its new home, the next two days determine how fast it bounces back. Reducing light intensity by roughly 20 to 30% for the first 24 to 48 hours lowers the plant’s transpiration demand, letting it put energy into root repair instead of fighting water loss through the leaves. Keep temperatures stable, somewhere around 21 to 26°C, and bump humidity up to 60 to 70% during that same window if you can manage it with a humidity dome or a light misting nearby.
Recovery usually shows up first as leaves returning to a normal, outward-facing posture rather than drooping or curling. New growth at the top of the plant within 3 to 5 days is the clearest sign the roots have re-established contact with the medium. If leaves are still drooping past 72 hours, or you notice yellowing spreading rather than isolated to a lower leaf or two, that’s your cue to check the root ball’s moisture level before assuming it’s a nutrient issue.
How do you harden off seedlings before an outdoor transplant?
Moving a seedling raised indoors or in a greenhouse straight into direct sun and open wind is one of the fastest ways to stall growth for a week. Hardening off gives the plant’s cuticle and root system time to adjust gradually.
Start the process 7 to 14 days before the final outdoor move. UC ANR Master Gardeners recommend beginning with an hour or two of filtered outdoor light in a sheltered, wind-protected spot, then adding an extra hour or two of exposure each day. By the end of the schedule, the plant should be tolerating a full day outside before it spends its first full night there.
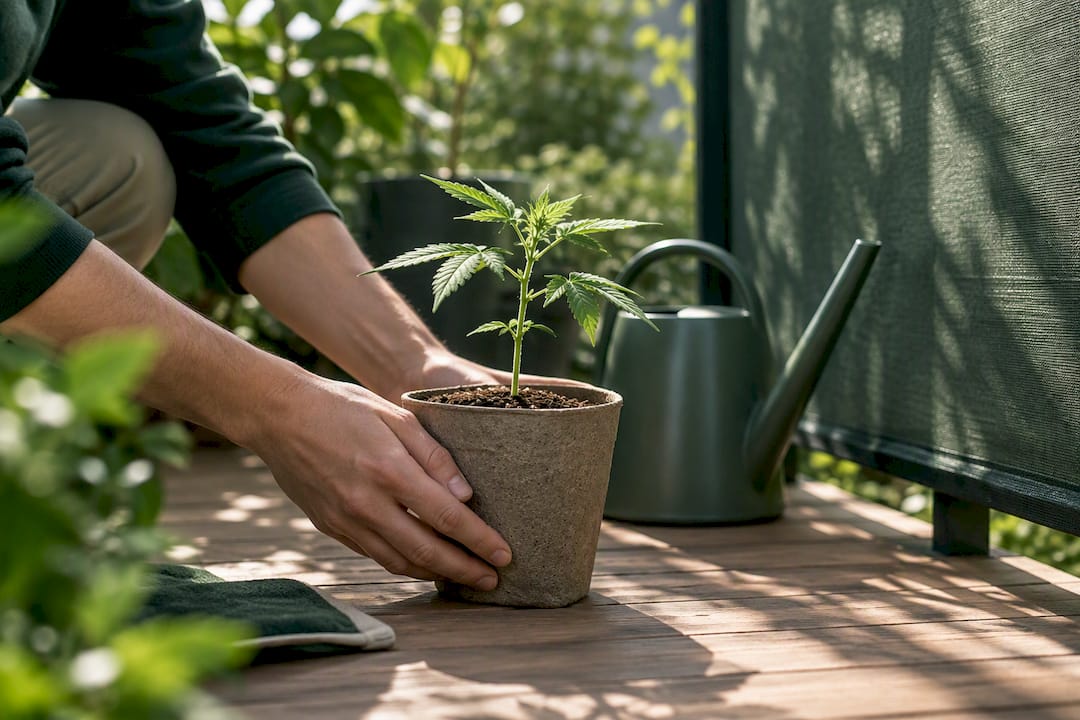
Nighttime exposure is where most growers get impatient and pay for it. Keep seedlings sheltered indoors or under cover any night temperatures drop below 50°F, since cold nights during hardening off undo a lot of the acclimation gained during the day. If a cold snap hits after the plant’s already outside full time, a simple cloche or row cover overnight buys enough insulation to avoid setting growth back.
A few practical points for the outdoor transplant itself:
- Time it for late afternoon or an overcast day, so the plant isn’t hit with peak sun stress on top of transplant stress.
- Use shallow, wide planting holes rather than deep, narrow ones if your soil runs cold. Cold soil at depth slows root uptake more than cold air does.
- Space plants according to their mature size, not their current seedling footprint. Crowding at planting time means competing root zones later.
- Water in immediately after planting to settle soil around the roots and eliminate air pockets, then hold off on the next watering until the top inch of soil dries.
What should you check after transplanting cannabis seedlings?
The first week after transplant is where problems either resolve themselves or spiral. A short daily check catches trouble early.
Daily checklist, days 1 through 7:
- Press a finger into the soil near the root ball; water only when the top inch feels dry, not on a fixed schedule.
- Check leaf posture in the morning; upright and turgor-firm leaves mean the roots are working, drooping ones mean investigate.
- Look for new growth at the top of the plant starting around day 3 to 5.
- Scan leaf undersides for early pest activity, since stressed plants are more attractive to spider mites and aphids.
Watering correctly matters more here than at almost any other growth stage. Overwatering a freshly transplanted seedling is the single most common mistake, because growers assume a drooping plant needs more water when it usually needs less oxygen at the root zone. Check the actual moisture of the root ball itself, not just the surrounding new medium, before adding water. Hold off on any nutrient feeding until 48 to 72 hours have passed, matching the same window covered in the transplant procedure above.
If leaves droop for more than two or three days, or you see yellowing that spreads rather than staying isolated, work through these in order:
| Symptom | Likely cause | Fix |
|---|---|---|
| Drooping, curling leaves, no new growth | Standard transplant shock | Wait it out; maintain stable temps and reduced light for 48 hours |
| Yellowing lower leaves, wet soil smell | Root rot from overwatering | Let the medium dry out fully; improve drainage next time |
| Pale new growth, slow recovery past a week | Nutrient lockout from pH drift | Flush with pH-adjusted water at the correct range for your medium |
| Wilting despite moist soil | Root damage during handling | Reduce light and humidity stress further; avoid disturbing roots again |
Some crop research points to advanced tactics for boosting transplant survival. A foliar nitrogen application study on rapeseed found that spraying 2.5 to 5.0 grams of nitrogen per square metre before transplanting improved survival rates by a significant margin. That’s a different crop, and cannabis-specific trials on foliar pre-transplant feeding don’t exist yet, so treat it as an interesting direction rather than a standard practice, and hold off trying it until your usual pre-transplant routine is already solid.
Pro Tip: If a seedling is drooping badly after transplant but the medium is clearly moist, resist the urge to add more water or nutrients. Nine times out of ten it’s root disturbance settling, not a deficiency, and it resolves in 24 to 48 hours on its own.
Should you transplant autoflowers the same way as photoperiod plants?
No, and this is where a lot of growers waste an autoflower’s limited lifecycle. Photoperiod plants can absorb two or three transplants across their vegetative stage with minimal consequence, since you control when they flip to flower. Autoflowers can’t. Their internal clock keeps running regardless of how stressed the roots are, so every transplant shock eats into a fixed window that doesn’t extend to compensate.
The fix is straightforward: plant autoflower seedlings close to their final pot size from the start, ideally 3 to 5 gallons, and avoid the multi-stage pot progression recommended for photoperiod genetics. An autoflower like Star Killer benefits from going straight into a final container rather than cycling through solo cups and intermediate pots. For more on choosing the right container size to avoid stunted autoflowers, our guide on avoiding small auto cannabis plants covers the sizing math in more detail.
Photoperiod growers have more flexibility but still shouldn’t push their luck near the flip. If you’re planning to switch light schedules to trigger flowering, give any recent transplant 7 to 10 days to settle into vegetative growth first. Flipping a plant that’s still recovering from root disturbance stacks two stresses at once, and flowering plants that start behind rarely fully catch up.
Why does this seed bank’s approach to seedling guidance hold up?
Theseedpharm carries over 200 strains, and every batch goes through quality inspection backed by a 90% germination guarantee, which means the seedling-stage advice here isn’t theoretical for us. Reliable germination is only the first half of a successful grow; what happens at transplant determines whether that germination rate actually turns into mature, healthy plants.
The technique outlined above lines up directly with the extension research and peer-reviewed findings cited throughout this guide: handle by the leaves, pre-moisten before you move anything, reduce light stress after the move, and match pot size to the plant’s actual growth strategy rather than a fixed schedule. If you’re just getting started, our guide on how to germinate marijuana seeds picks up the process a step earlier, and our piece on why you shouldn’t plant seeds directly in garden soil explains why controlled starter media sets up an easier transplant later. Discreet, tracked shipping across several countries means the seeds behind this advice reach growers reliably, wherever they’re starting from.
A grower’s honest take on transplant day mistakes
Most transplant failures trace back to one of three habits: moving a bone-dry root ball because watering “felt like a hassle” the day before, transplanting outdoors on a cold night because the calendar said it was time, or feeding immediately because patience runs thin. Every one of those is avoidable, and none of them are really about skill. They’re about discipline on a single day.
If you remember nothing else, memorize this: check roots, check leaves, pre-moisten the medium, handle by the leaves, water the perimeter, wait 48 hours to feed. That six-step sequence covers most of what separates a seedling that sails through transplant from one that sulks for two weeks.
— The
Seed choices that make transplant success easier from day one
Picking the right genetics before you ever start germinating shapes how forgiving your transplant window will be. If you’re building a CBD-focused grow, the Harlequin 1:18 CBD seeds give you a strain with a well-documented growth pattern, useful when you’re planning pot progression in advance rather than reacting to surprises. For growers who want a more balanced cannabinoid profile, the Girl Scout Cookies 1:1 CBD seeds work well as a photoperiod option where you have the flexible multi-stage pot timeline to work with.
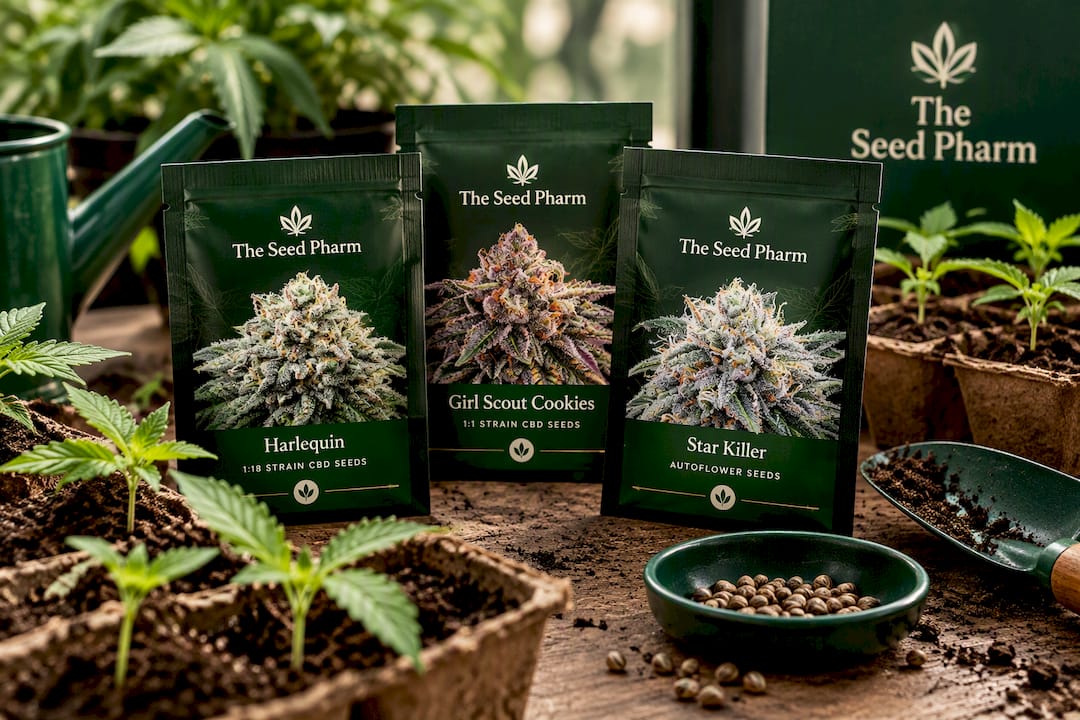
If your growing calendar or space favours a shorter lifecycle, the Star Killer autoflower seeds are built for exactly the near-final-pot strategy covered above, skipping the multiple transplants that cost autoflowers precious time. Every seed batch across our full catalogue of feminized, autoflower, regular, and CBD seeds is inspected for quality and backed by our 90% germination guarantee, so the timing and technique in this guide have a fair shot at working from the moment the seed cracks open. Orders ship discreetly and tracked, and larger orders come with free seeds added in. Browse the current strain selection and pick genetics that match the transplant strategy you’re planning to run.
Sources
For deeper reading beyond this guide: Utah State University Extension covers seedling culture and transplant handling in detail. UC ANR Master Gardeners breaks down hardening-off schedules. The MDPI study on Rhizophagus irregularis documents mycorrhizal effects specifically on cannabis seedlings. For strain background relevant to grow planning, see this comparison of hybrid and indica genetics.
- Foliar N supplementation improves rapeseed transplanting survival rate and yield
- Starting vegetable seeds indoors: IV. Seedling culture and transplanting — Utah State University Extension
- Growing transplants — UC ANR Master Gardeners Santa Clara County
FAQ
How big should cannabis seedlings be before transplanting?
Seedlings are ready once they show two to three true leaves beyond the initial cotyledons, with roots visibly filling the starter container or pressing against its walls. Waiting for both signals together, rather than just one, gives the most reliable timing window.
When should I replant my cannabis seedlings?
Replant as soon as roots are visible at drainage holes or pressing against a clear cup’s sides, typically 10 to 14 days after germination in a solo cup, or 2 to 3 weeks in plug trays. Waiting past this point risks the roots matting into a dense mass that’s harder to loosen without damage.
Can I transplant seedlings outside, and if so, how?
Yes, but only after a hardening-off period of 7 to 14 days that gradually increases outdoor light and air exposure. Keep seedlings sheltered on any night the temperature drops below 50°F, and plant during late afternoon or on an overcast day to reduce sun stress on the transplant.
How big do my seedlings need to be before transplanting?
The size that matters is root fill and leaf count, not overall plant height. Once roots occupy roughly 80% of the starter container’s volume and two to three true leaves have developed, the seedling is ready to move up regardless of how tall it’s grown.
Recommended